Back to 3. Design, Layout, Colors
I know, we still have no content on our site but before we create it, let’s have a look on the user accounts of our new Joomla website. When you installed Joomla, you created the Super Administrator account. This user is allowed to do anything. It is nice to be that user but it is dangerous too. You will probably have more than one user account on your website, e.g. authors who write articles.
To get more used to these topics, let’s build a platform for authors where they can post articles and upload images without the need to enter Joomla’s control panel. Follow the example and you’ll learn a lot about Joomla :)
About users, roles and permissions
Users are in general able to login on the frontend and/or the control panel just depending on their role permissions. A user account has to be a member of a user group. Instead of assigning access permissions to each user, they are assigned to a group. The individual user is then assigned to one or more groups. Imagine you have 10,000 users in four different groups. It’s very easy for the administrator to change the permissions for each of the groups. Without groups, you would have to change every user account manually. However, when using groups, you only have to change permissions once!
Joomla comes with predefined groups like author and publisher which are easy to understand. An author is able to create/write something, a publisher has the additional permission to publish content.
- The predefined frontend user groups are: visitors, registered users, authors, editors, publishers.
- The predefined control panel user groups are: manager, administrator, super administrator
Example: A website where authors can post articles
This is a very simple workflow but it covers some possibilities that exist in Joomla. I assume that you have a “naked” Joomla without sample data and you have a super administrator user account.
The desirable scenario
- Admin user in control panel:
– activates the admin notification when someone creates a new user account
– creates a user menu for registered users with a link to create an article - Visitor on website:
– registers as a new user - Admin user in control panel:
– receives a notification and assigns the user to the authors group - Author user on website:
– is able to create an article but is not allowed to publish it - Admin user in control panel:
- receives a notification that there is new content available
– publishes the article on the frontpage
Parameter and user menu
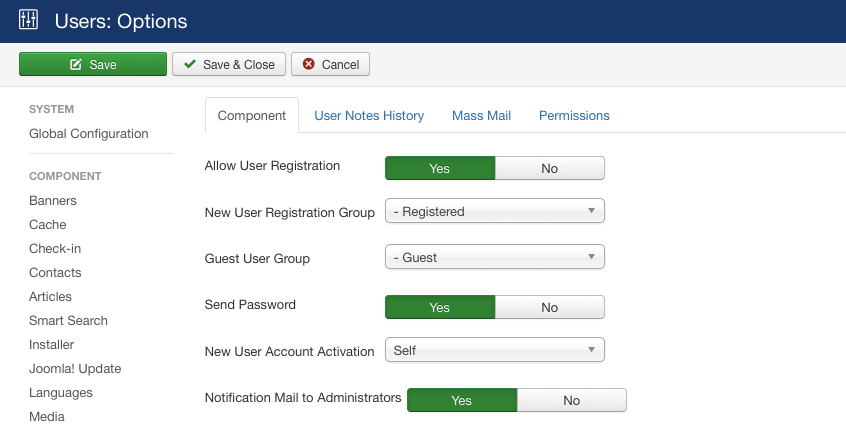
We have to set a few switches in the user options. Go to Users → Manage → Options and activate Allow User Registration and Notification Mail to Administrators (Figure 1).
Then we need a menu for logged in Users. Go to Menus → Manage → Create new menu and create one:
- Title: User
- Menu Type: user
- Description: A menu for a user with useful links
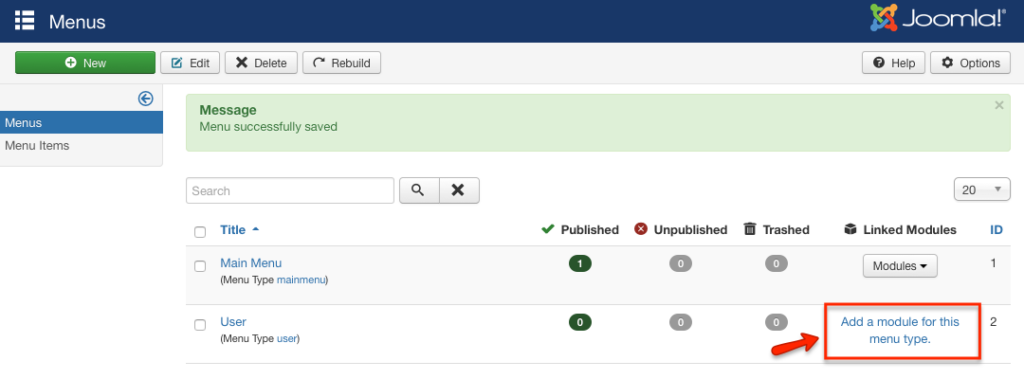
Save and close it. You have now created a kind of menu container. What’s missing is the links inside the menu container and a linked module that displays the new menu at a certain position in the template. To create and link the module, click on the link Add a module for this menu type (Figure 2).
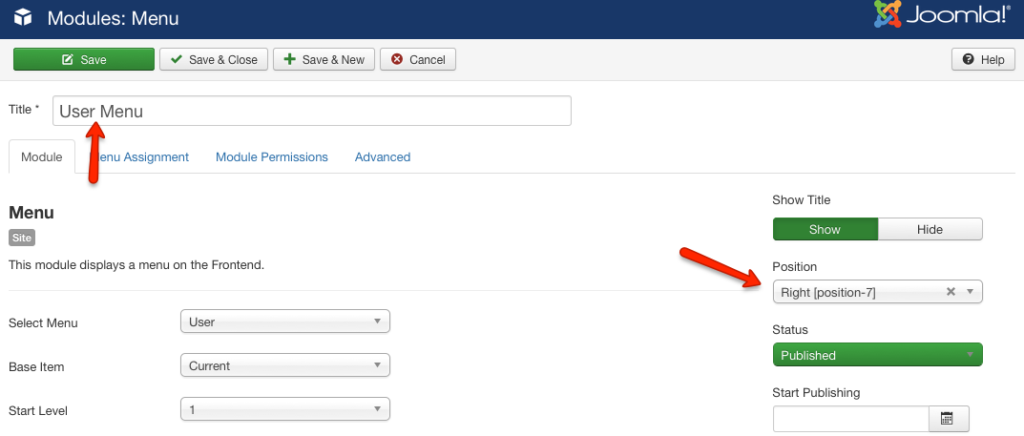
In the module form you have to add a title (User Menu), the position (Right – Position-7 in the Protostar template), the access permission (registered users). Don’t forget to save & close it (Figure 3).
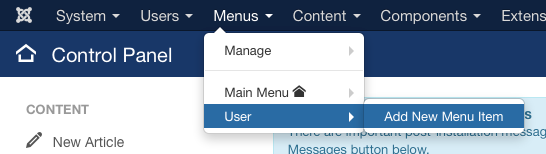
Now we need the “Create article” link in our menu that should be shown to authors. Go to Menus → User → Add New Menu Item (Figure 4).
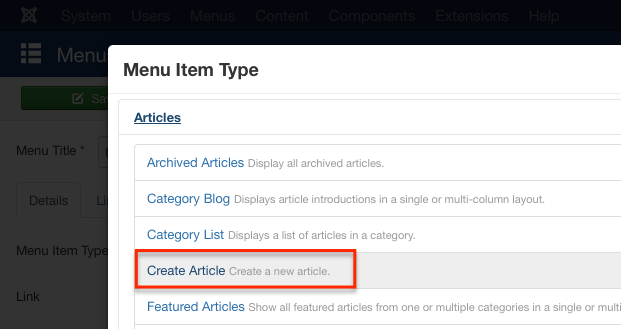
In the following form you have to enter the name/description of the link (Menu Item Title), select a Menu Item Type (Figure 5) and restrict the access to registered. Each Joomla component can provide Menu Item Types. Our type (create article) is provided by the content component which is a part of Joomla core.
After you saved and closed the dialog a new menu item should be displayed in the list (Figure 6).

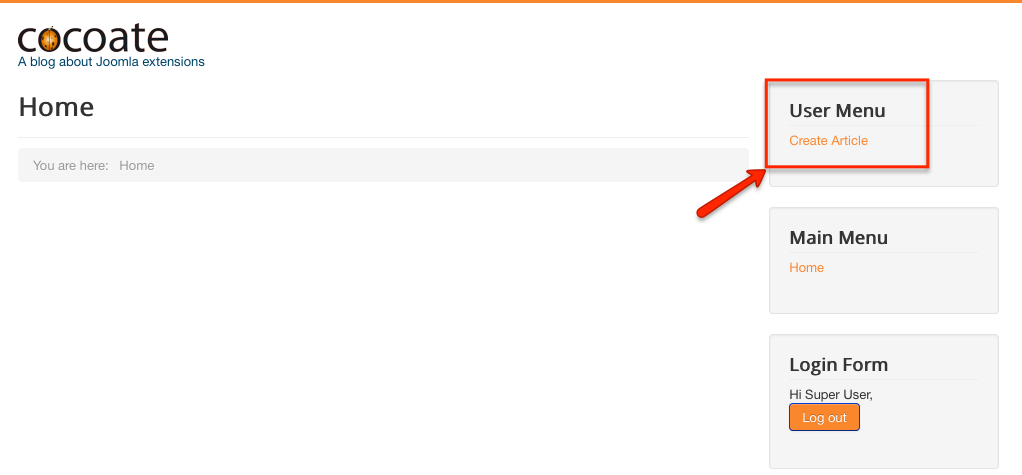
Test your work! Login on the frontend with your super administrator account. After the login, our new user menu with the create link appears (Figure 7).
Please log out after the test.
Registration as a new user
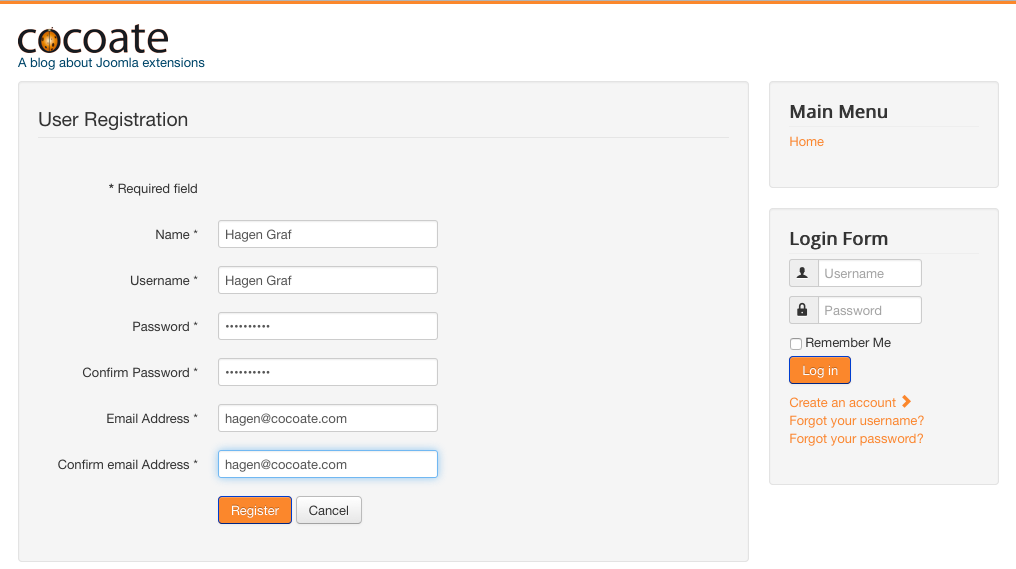
Now we create a new user account. Please access the website as any other visitor and click the Create an account link. Fill out the form and click the Register button (Figure 8).
If your server stack allows sending emails, a notification email will be send to the email address of the super administrator account.
Joomla offers a CAPTCHA to prevent spammers. To use it, activate the CAPTCHA plugin under Extensions → Plugins and select it in the options of the User Manager where you can configure the general behaviour of the login process too.
Assignment of the new user to the authors group
Log in with your Administrator account on the control panel, access Users → Users and click on the name of the new user (Hagen Graf). Check the Author group in the Assigned User Groups tab (Figure 9).
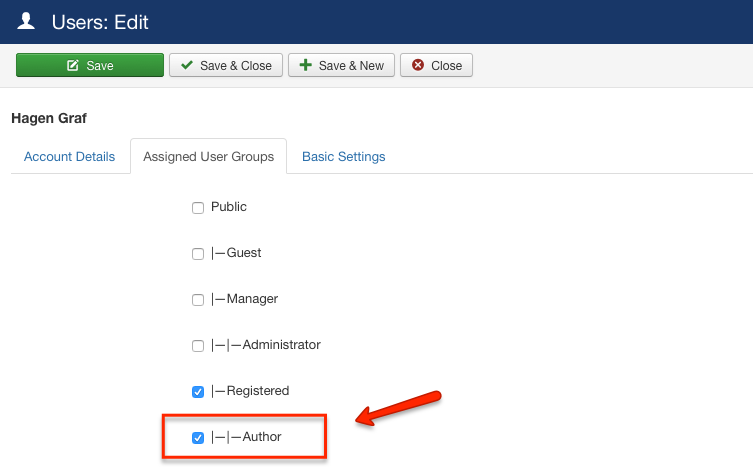
Depending on your environment it might be necessary to enable and activate the new user account. Just click on the red icons to do so (Figure 10).

Now we have a new author on our website.
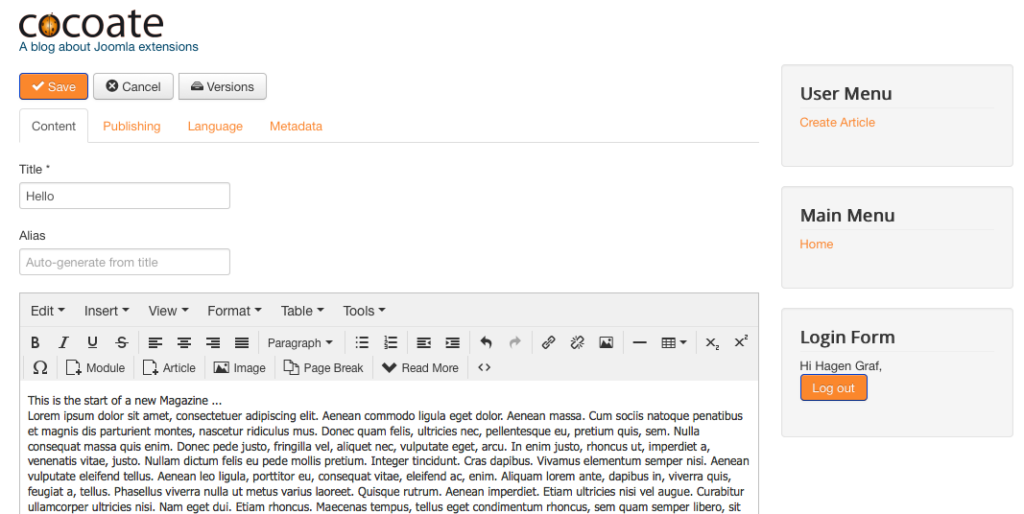
The new author creates an article
Now switch your identity to the one of the new author, log in with your new user account on the website and click the create article link. Just add a title and a few words and click save (Figure 11).
The article is saved and submitted but the user (you) cannot see it, because it is not published. I configured this workflow intentionally as in some cases it is desired to have another person to edit the created content and then publish it.
Of course, it is also possible to skip that, add the user to the group Publisher and then the article would be published immediately.
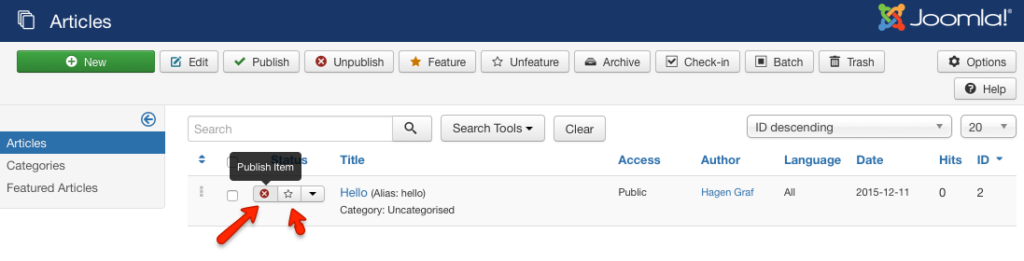
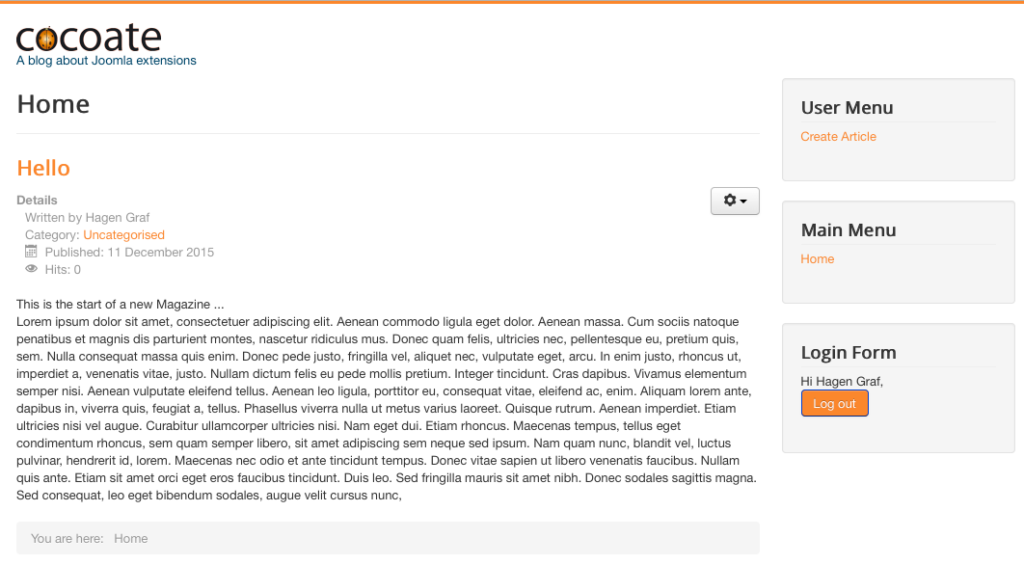
The admin publishes the article on the frontpage
Joomla comes with a messaging system and this system creates a message when new content was created by a user. Depending on your settings (Components → Messaging → Options) the admin receives that message by email or via the screen. The admin has to go to Content → Article Manager and publish the new article. If the article should appear on the frontpage, click on the featured icon (Figure 12, Figure 13).
Tweaking the process
As we already noticed while following this example, many topics are covered and the configuration is easily done depending on your needs. There is a huge amount of permissions, options and settings to discover.
I’ll provide a few examples in the following chapters.
Leave a Reply