Back to: 1. What is Joomla
Panic …. where and what to download? Where to install? Why installing? What do I install?
You have a few possibilities to start with Joomla. You can install Joomla
- on your local computer
- forever free at joomla.com
- on a server from your hosting provider
- on the 90-day free Joomla! demo account (demo.joomla.org)
In order to install Joomla! on your local computer, it is necessary to set up your “own internet”, for which you’ll need a browser, a web server, a PHP environment and as well a Joomla supported database system. We call this a solution stack and a client server system. A solution stack is a set of software subsystems or components to make a fully functional Joomla website possible. The solution stack we need consists of
- the operating system (Linux, Windows, OSX)
- the web server (Apache, IIS)
- the database (MySQL, PostgreSQL)
- the script language (PHP)
You can build a solution stack on your own machine at home or you can buy or rent it from a hosting company in different “flavours”.
The specific requirements for Joomla 3.5 are described in Table 1.
| Software | Recommended | Minimum | More information |
| PHP (Magic Quotes GPC off) |
5.5 + | 5.3.10 + | php.net |
| Supported Databases: | |||
| MySQL (InnoDB support required) | 5.1 + | 5.1 + | mysql.com |
| SQL Server | 10.50.1600.1+ | 10.50.1600.1+ | microsoft.com/sql |
| PostgreSQL | 8.3.18 + | 8.3.18 + | postgresql.org |
| Supported Web Servers: | |||
| Apache (with mod_mysql, mod_xml, and mod_zlib) In order to use SEO URLs, you will need to have the Apache mod_rewrite extension installed. |
2.x + | 2.x + | apache.org |
| Nginx | 1.1 | 1.0 | wiki.nginx.org |
| Microsoft IIS | 7 | 7 | iis.net |
Table 1: Requirements for Joomla 3.x
Since this issue is the same for all PHP-based systems, I would like to look a little closer on that topic.
Installation variants of PHP-based systems
You need all the components mentioned above to install a Joomla! system for yourself. PC, browser, and Internet connection are usually available. There are a number of options for web server, PHP interpreter, and database.
You can:
- set the system up locally on your PC
- set the system up on a server in a company’s Intranet
- rent a virtual server from a provider
- rent or purchase a server from a provider (with root access)
You can also:
Have the web server and database located on computers that are physically separated from each other.
As mentioned above you can also, of course, use different:
- brands of web servers
- versions of PHP interpreters
- Versions of MySQL databases
- And on top of that, you can install and operate all these components on various operating systems.
This freedom in choice of resources can sometimes confuse a layman. Therefore, we will discuss a few typical scenarios.
Local Test Environment
If you are at home or in your office, for example, and want to set up a Joomla! website, you may use any of the following operating systems.
Windows Operating System
For a Windows operating system you can use either of two web servers:
Use the in build Internet Information Server, install PHP, MySQL and configure them or take a pre-configured package (XAMPP), unpack it on your computer, and everything you need is there (http://apachefriends.org).
Linux Operating System
Here it depends on the distribution version you have. All the distributions allow simple installation (with a click of the mouse) of the Apache, PHP, and MySQL packages. At times, depending on distribution, they may already be pre-installed. So you can use the programs contained in the distribution or a preconfigured package (XAMPP); extract it on your computer and everything you need is there (http://apachefriends.org).
Mac OS X Operating System
In Mac OS X operating system, you have a default web server (Apache) in your system that you have to activate, but unfortunately not PHP and no MySQL.
So you can use the installed Apache web server and install the missing software or the pre-configured XAMPP package for Mac OS X. Another complete package by the name of MAMP is also very popular with the Mac OS X environment (http://www.mamp.info).
Production Environment
You have several options here as well.
Rented Virtual Server
You rent a web-space package with database, PHP support, and often also your domain name from a provider. In this case you have a functional environment and you can install your Joomla! into it. Consult your provider as to the version choices (PHP, MySQL). Sometimes providers offer Joomla! pre-installed with various templates. If this is the case, all you have to do is activate Joomla! with a click of the mouse and it is ready for you.
Your Own Server
You rent a server from a provider and install the operating system of your choice. You are the administrator of the system and you can work on it, just like on your PC at home.
Before you venture into the wilderness of the Internet, you should first practice on your local computer. This has the advantage that there are no connection fees, it is very fast, and you can practice at a leisurely pace.
You may even have a small local network at home where you can install Joomla! on one computer and access it from another.
Remember that there are probably more current versions on the respective project sites on the Internet.
Stumbling stones
This topic is very complex because there is a vast number of providers and an even greater number of installed web server, PHP, MySQL versions and web space management tools. Crunch points during the installation often consist of:
- an activated PHP Safe Mode, preventing you to upload files,
- ‘forbidden’ rewrite paths with the Apache web server because the so-called Apache Rewrite Engine (mod_rewrite) is not activated,
- the directory permissions on Linux and OSX, which are set differently than in Windows.
- Basically, the easiest way that almost always works, is the following:
- Download the current file package from the project website to your home PC and unzip everything into a temporary directory.
- Load the unpacked files via FTP on your rented server or to the directory of your local installation. The files must be installed in the public directory. These directories are usually called htdocs, public_html or html. If there already are other installations in that directory, you can specify a subdirectory
If the solution stack is up and running, we call the result a server. The server can be your local computer or any other computer. All the visitors and users of the website are using a browser on their computer to access your Joomla site. We call them clients.
The “classic” LAMP stack (https://en.wikipedia.org/wiki/LAMP_{0f2b36d8f80fa52f37b916148a6e37fe671d96583f68d5887344addd2eee52a6}28software_bundle{0f2b36d8f80fa52f37b916148a6e37fe671d96583f68d5887344addd2eee52a6}29) looks like in Figure 1.

The Joomla Web Installer
Thanks to the web installer, Joomla! can be installed in only a few minutes. The Joomla! files will be copied to the public document root folder and configured with the Joomla! web installer. Download Joomla! 3.5 from joomla.org (joomla.org/download.html) and unpack the files into your public document root folder of the web server (e.g.: /htdocs). From now on, everything is going really fast because the Joomla! web installer is working for you. Go to URL http://localhost/ or the appropriate URL of your server.
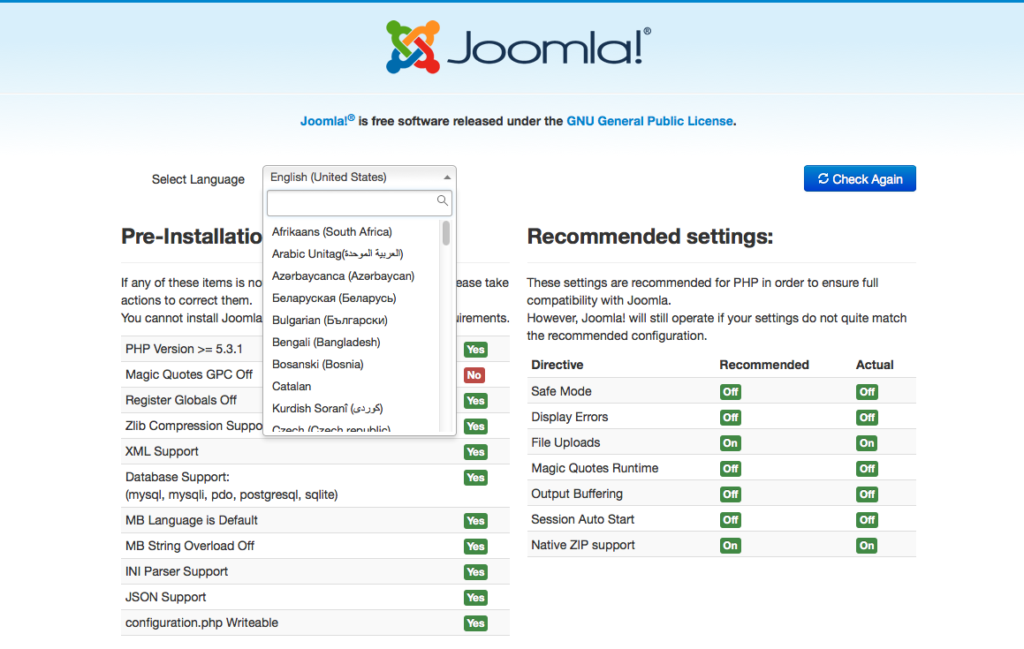
Notice: If something is wrong with your solution stack, the pre installation check helps you to verify whether your server environment is suitable for the installation of Joomla!. As long as you see a red marker, your solution stack is not configured in a proper way and the installer refuses to install Joomla. When using Unix-like Systems (Linux, Mac OS X), you have to pay attention to file permissions. This is particularly important for the file configuration.php. This file will be generated at the end of the installation with your personal values. If the installer can not write in the folder, Joomla! can not be installed. In this case, configure the rights and then click the button repeat check.
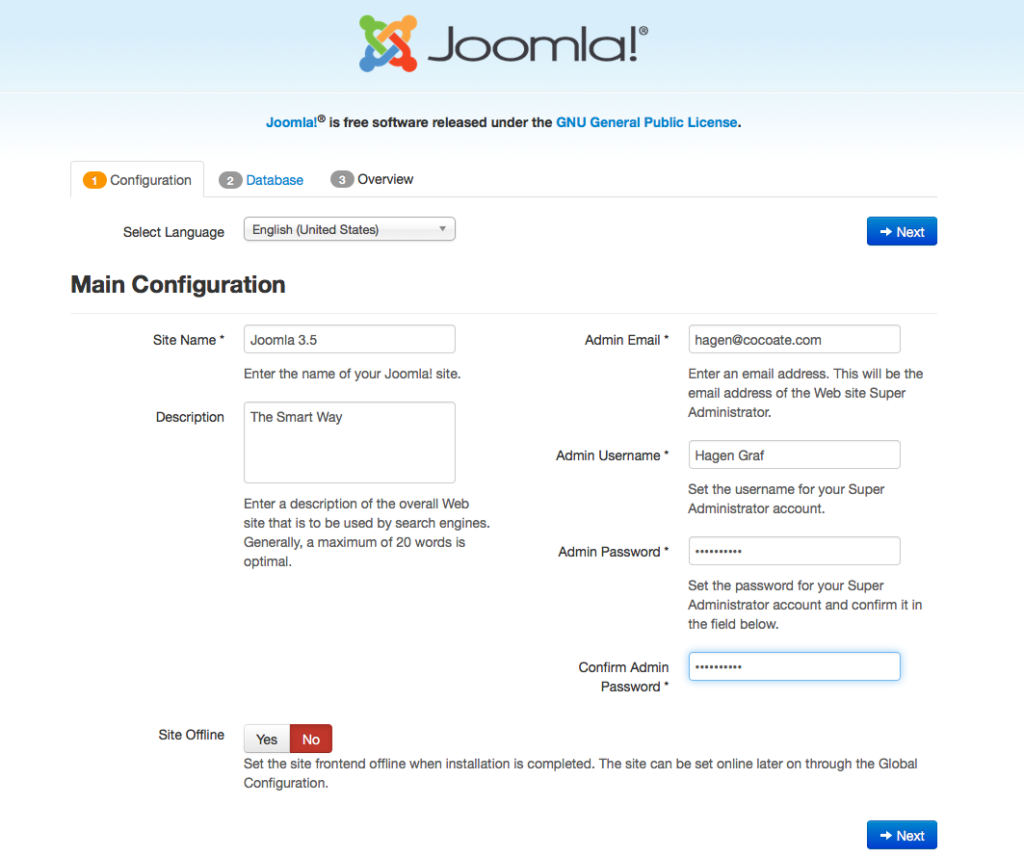
Step 1 – Configuration
In the main configuration window you have to describe your site and the administrator user. Furthermore, there is a switch to decide whether your site will be immediately visible for visitors (online) or if it will display a maintenance page (offline). This configuration setting is useful when you install Joomla directly in your live hosting environment (Figure 3).
Step 2 – Database
You can use various database servers with Joomla and you have to decide which database server you want to use and you need to enter your database parameters (Figure 4). In your local server environment you can create any number of databases. In the MAMP package and in Ubuntu Linux, you have a MySQL user with the name root. The user root is the MySQL administrator and can, therefore, do everything in your MySQL system. The password depends on your server environment (no password is needed with XAMPP, with MAMP the password is root too). When you are in a live hosting environment these parameters will be given to you by your provider.
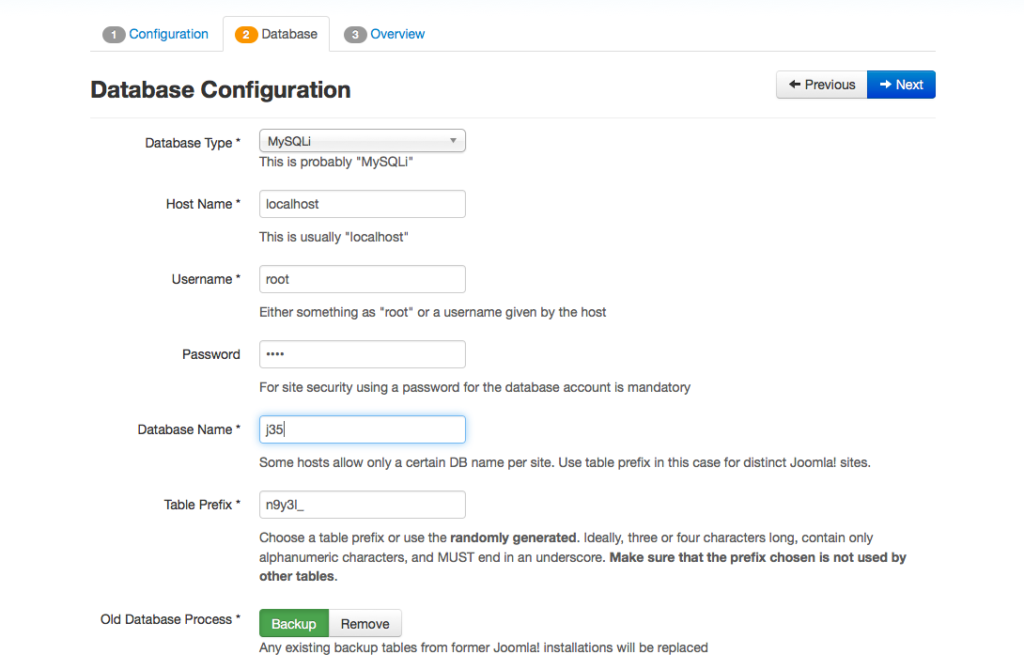
Enter the following values into your local installation:
- Host Name: localhost
- username: root
- Password: [only you know that]
Now select the database name. In a productive environment on a database server with a provider, you probably have a fixed quota of databases and the database credentials are predefined. If you have root permission on your database server, you can enter a name of a new database. Joomla! will then create that database. You can select whether the tables of any existing Joomla! installation in this database should be cleared or saved and marked with the prefix bak_. The table prefix is really practical. In front of each table name generated by the web installer, it writes the text that you typed in the appropriate field. As a default, the web installer suggests a randomly created one, like n9y3l_ . This has a simple reason. Sometimes you may only be able to get one MySQL database from your provider. If you want to run two or more Joomla! sites, you have a problem, as the tables do not differ from each other. With the table prefix it is possible to distinguish several tables (client01_ or client02_). Here, you should use the default n9y31_ . The prefix is also used to indicate saved data (bak_), see above.
Step 3 – Finalization
In the third step, Joomla summarizes the configuration settings and asks if you want to install sample data (Figure 5).
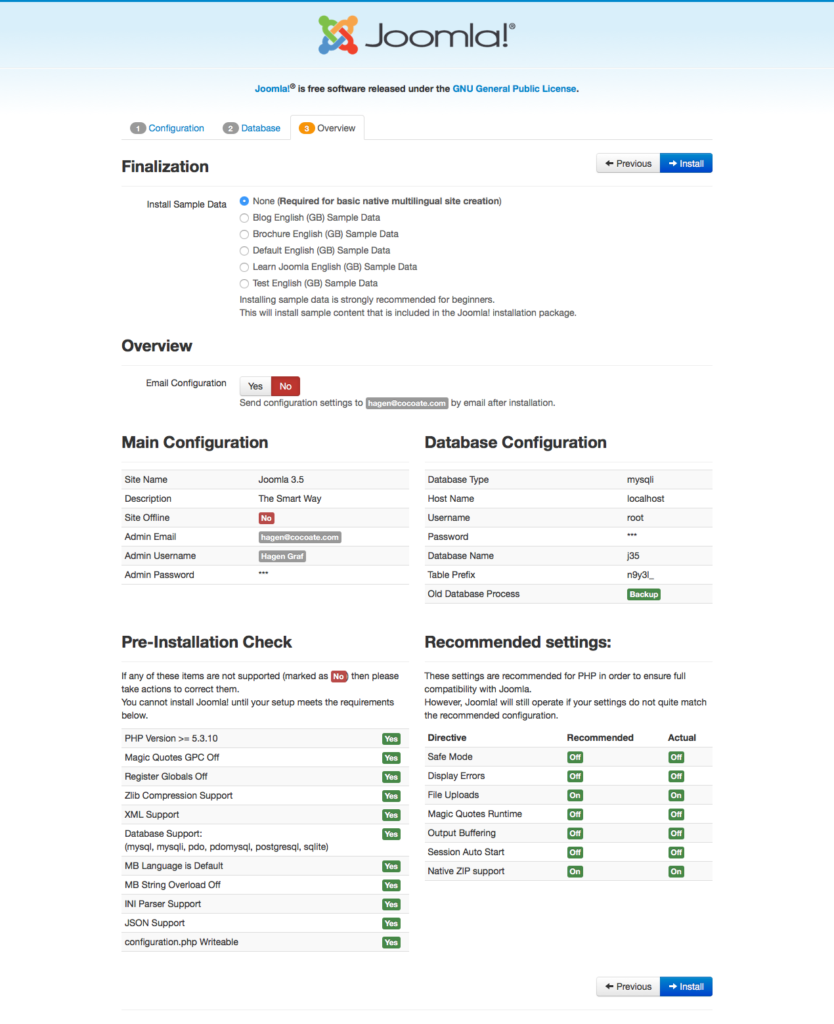
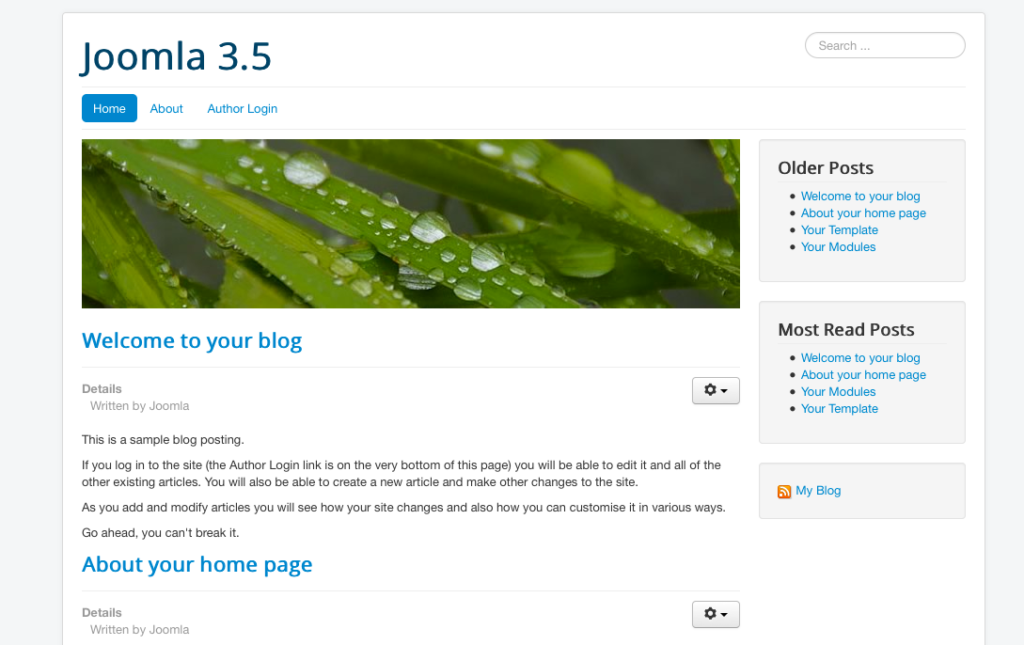
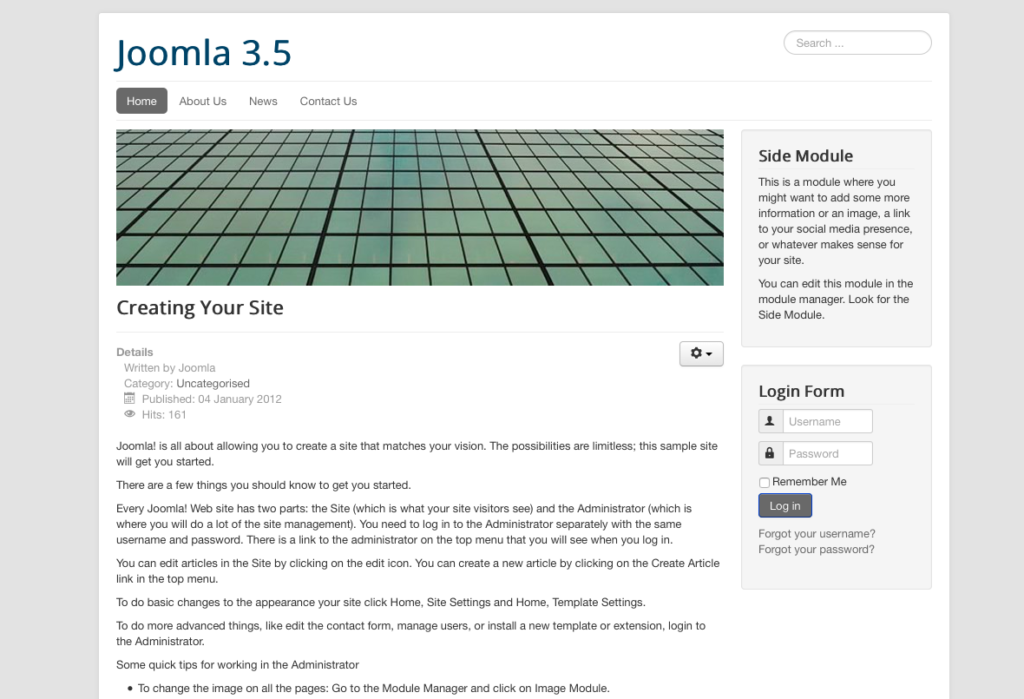
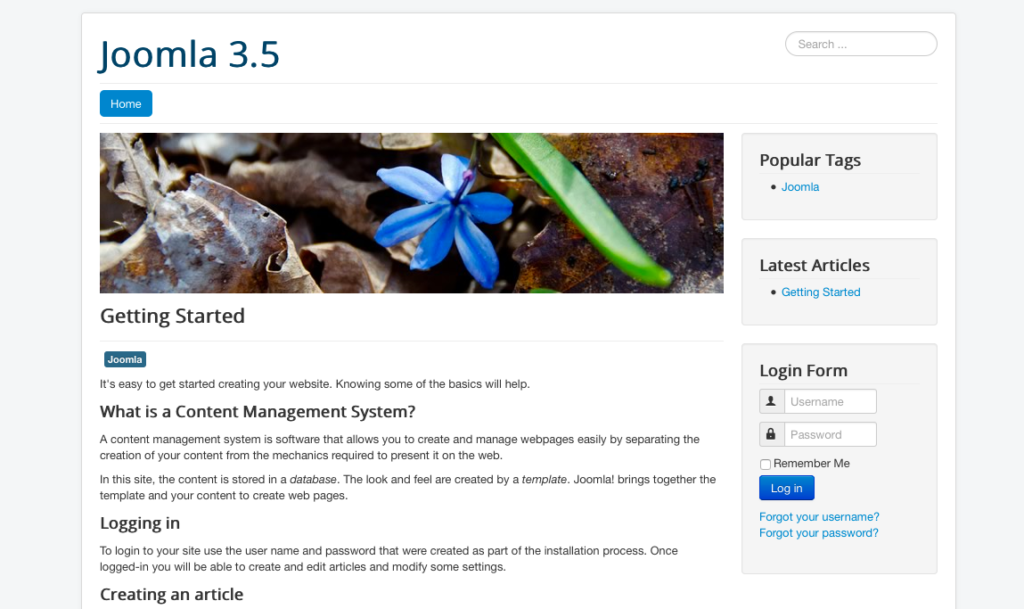
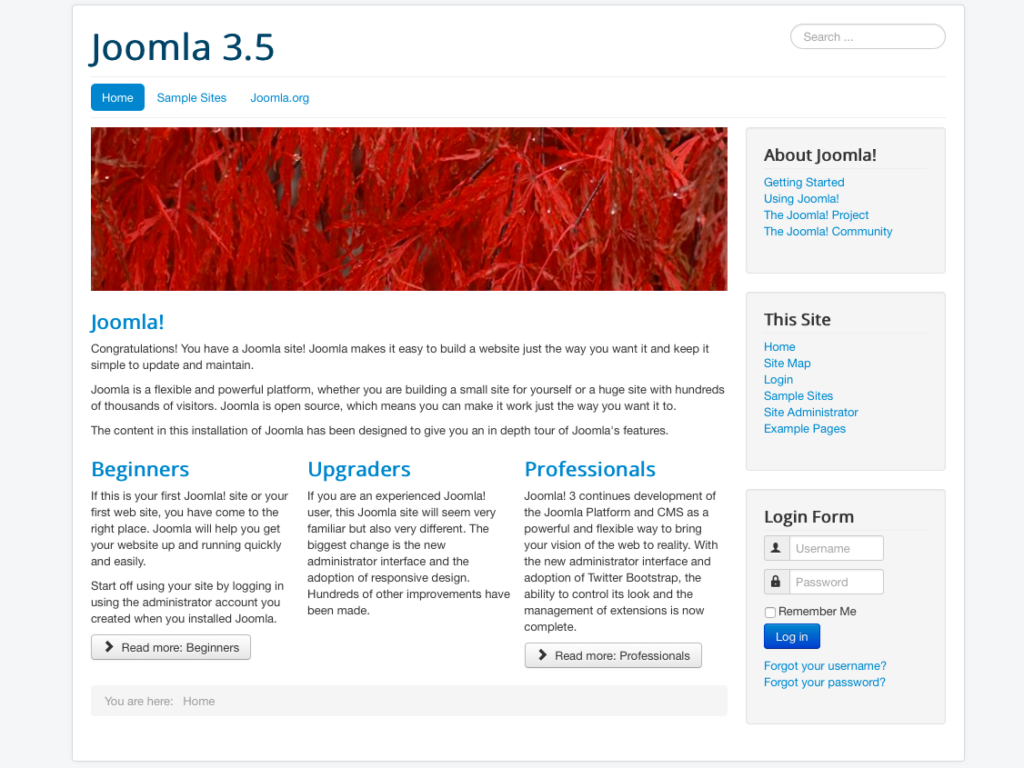
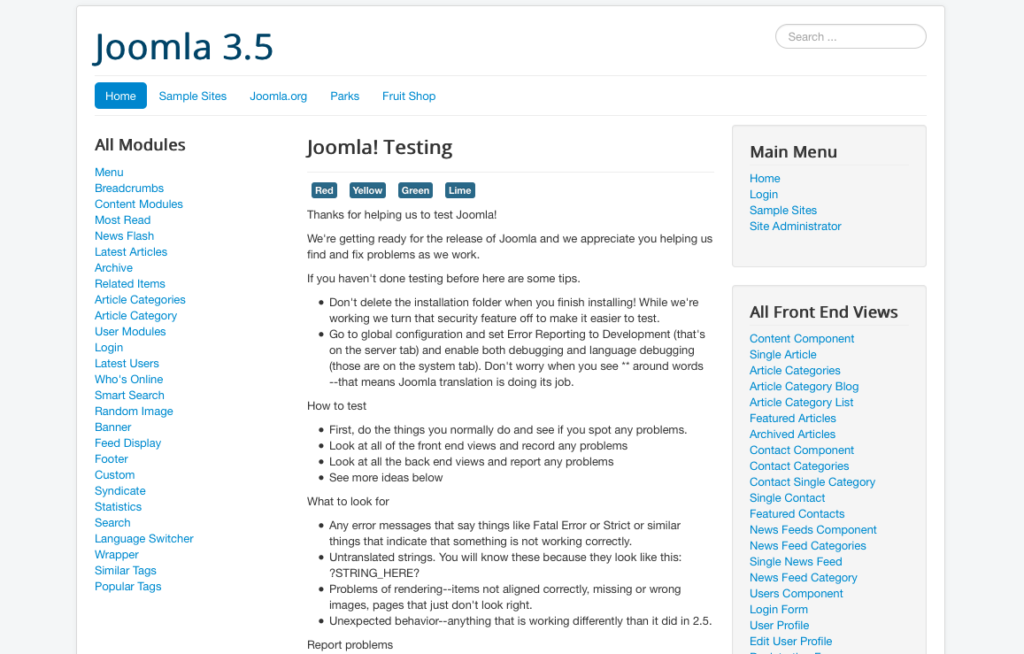
In former versions of Joomla it was only possible to install ONE set of sample data. Since Joomla 3.x it is possible to choose of several sample data sets. The “sample data system” can be used to configure a predefined site layout and example content for a weblog (Figure 6), a brochure site (Figure 7), a “Learn Joomla” site with a Joomla tutorial inside (Figure 8) the default site (Figure 9) and a test Joomla site where every possible menu link is activated as a base to test new Joomla releases.
Notice: There are several possibilities in the Installation process. If you want to try all the different versions is easy to install a new Joomla website with the existing files and database. Just keep the installation folder, delete the database and the file configuration.php in the root folder and start over by pointing to
Depending on your needs and your knowledge, you should try the different sample data sets. Unfortunately it’s not possible to switch between the different sample data sets after the installation is finished. It’s also possible to install Joomla without any sample data. The “empty Joomla” is a good start for your website if you already know how to use Joomla. I’m choosing a naked Joomla without any sample data as a base for the next chapters. You’ll be able to understand and follow the chapters without of the pre-installed sample data. So choose the sample data you want to use and click the Install button. Joomla creates the database and configures the site for you (Figure 11).
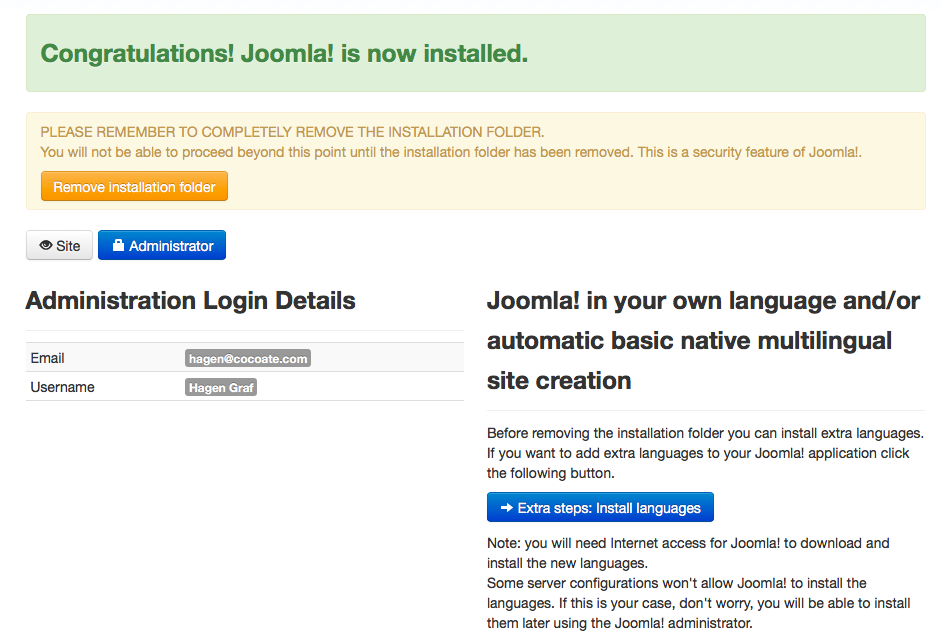
For security reasons, it’s necessary to remove the installation folder by clicking the Remove installation folder button … BUT WAIT … there is something really nice on the right side of Figure 11.
Joomla in your language
At this stage of the installation you have the possibility to install extra languages. If you plan to have your website in another language than English, click the Extra steps: Install languages button to install one or more additional languages (Figure 12).
Notice: THIS IS AN OPTIONAL EXTRA STEP! It’s not necessary to decide now on the language issue, it is possible to do it later. If you just want to play around with Joomla and you understand English, do it in English and use just one language – it’s easier for beginners. If you are a bit more advanced, start with localization in two or three language. Life gets much easier if you understand these languages!
Multilingual websites are the most advanced topic and it’s more about workflow and how to translate the content pieces of the site. So that should be your third step.

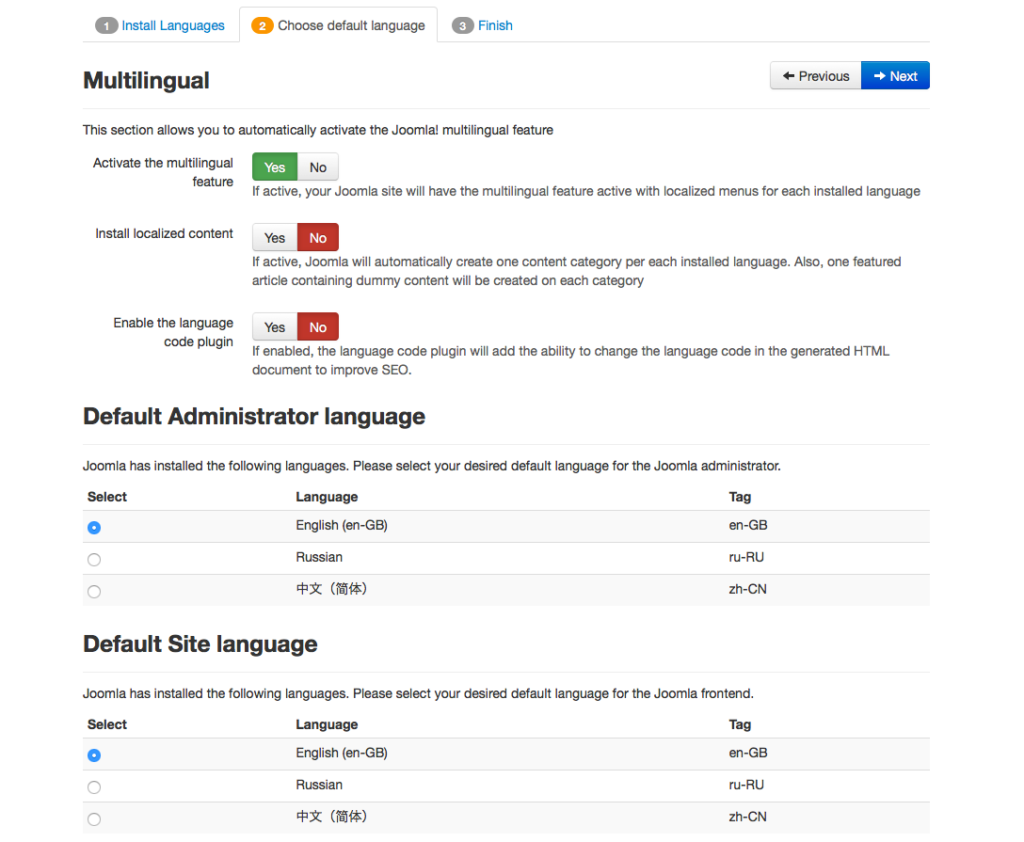
Choose the desired languages from the list, in my case i choose Chinese and Russian. Then you have to decide which language is the default language for your website and your administration interface (Figure 13).
The next question is whether you want to active the Joomla! multilingual feature.
There is a big difference between the “simple” localization and the “more advanced” multilingual behaviour.
- Localization: Localization in our case means that the website is in a different language than English, for example French. In a country like France, most websites are in French because most of the people that live in France speak French. In Switzerland the situation is different. People speak German, French or Italian. Same situation in countries with more than one official language. To create a pure “one language, different to English” site you can choose the NO for the Activate the multilingual feature parameter (localisation).
- Multilingual website: A multilingual website means offer your website in more than one language. You translate your content for each language you are offering. One of these languages is the default language which is shown, when a visitor visits your site for the first time.
If you want to start with a multilingual website, you can choose YES and the multilingual features of Joomla will be activated.
Congratulations! Joomla! is now installed!
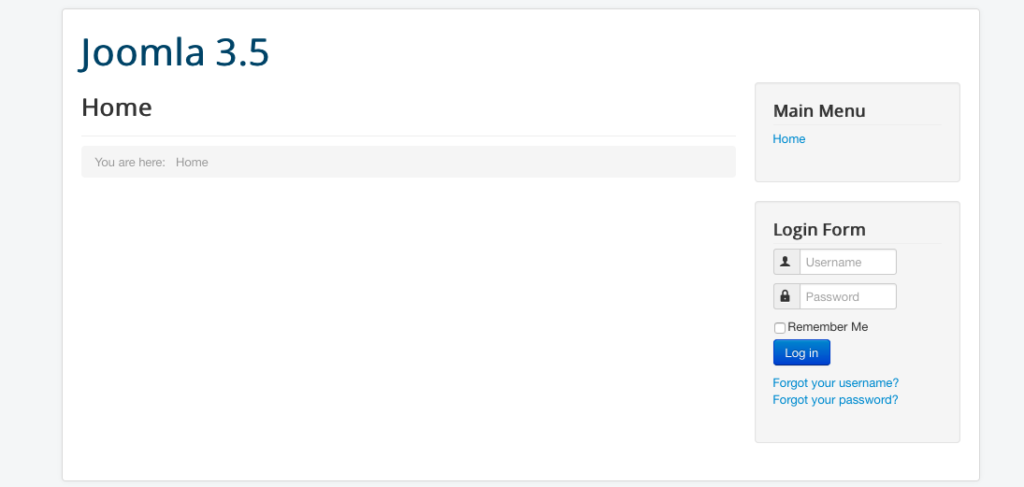
For security reasons, it’s necessary to remove the installation folder by clicking the Remove installation folder button. After the removal of the installation folder it is possible to view the site and to enter the administration area (/administrator). In my case the site looks like in Figure 14.
The Joomla control panel can be accessed by pointing to
http://your_domain.tld/administrator
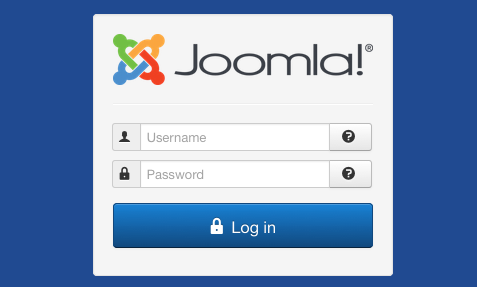
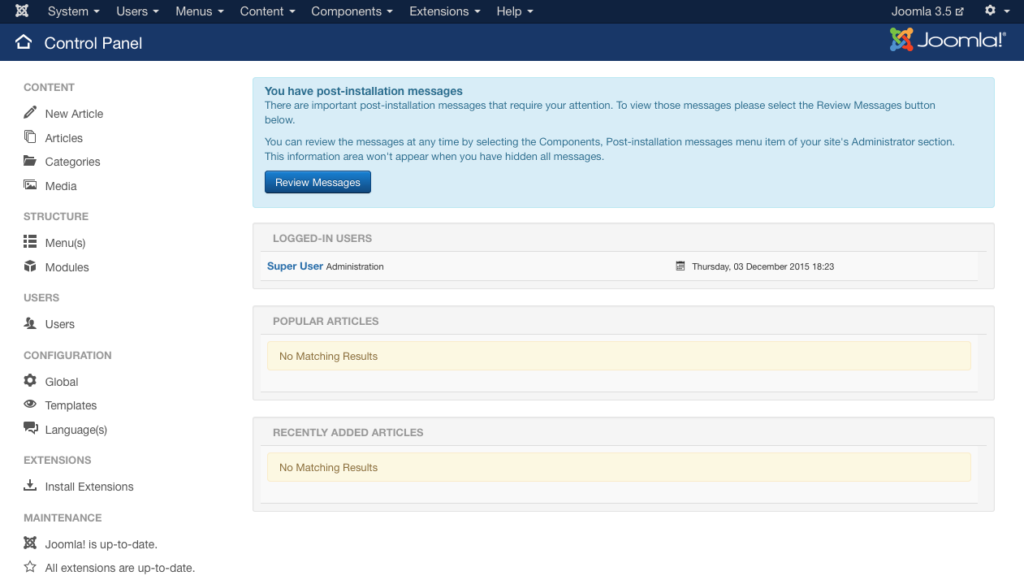
A login screen appears (Figure 15) and after a successful login you’ll see the administration area (Figure 16).
Leave a Reply